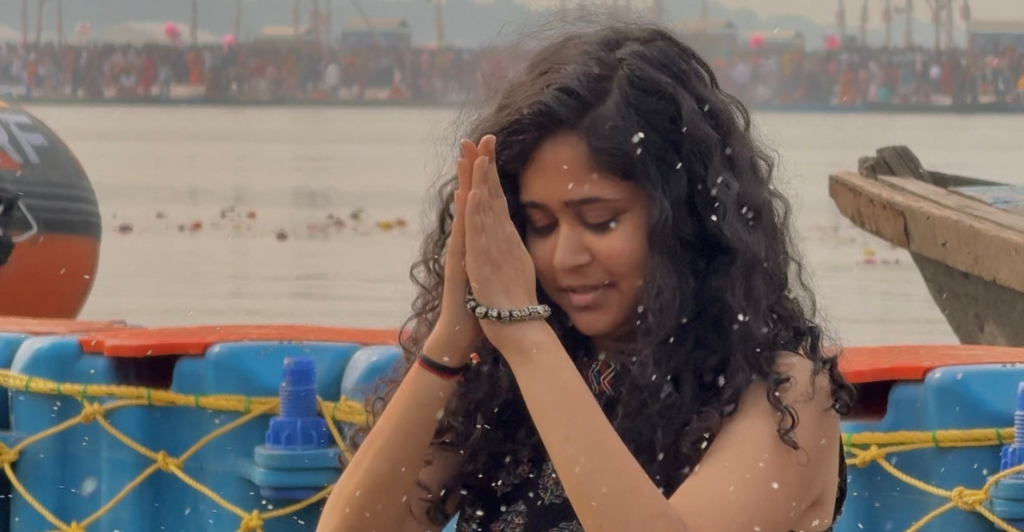
Everest Base Camp was always on my bucket list.
But when I actually sat down to plan it, I realised I wasn’t ready—not physically, not mentally. It felt like too much… for now.
That’s when I came across the Annapurna Base Camp trek. It looked beautiful, seemed doable, and I thought, “Let’s start with this.”
And honestly, it turned out to be one of my best trips so far (IK I say this a lot but this actually was pretty good)!
This trek takes you through quaint mountain villages, thick forests, pretty waterfalls, and snow-capped peaks. Here’s how it all went:
Itinerary & Travel Details


I took a flight from Mumbai to Kathmandu with a layover in Colombo. Then from Kathmandu, I flew to Pokhara. Three flights in two days…hectic, but I saved quite a bit of money.
I stayed in Pokhara for a day. It’s a lovely city. If you have time, I definitely recommend spending a few days here. Beautiful and affordable stays, Pinterest-y cafes with delicious food, great shopping, and lots of places to explore nearby.
The next day, I headed to Ghandruk. First, I booked a private cab through InDrive from Pokhara to the Permit Office. The trekking permit cost NPR 1000. You just need your passport and a passport-sized photo. After that, I continued in the same cab to Hari Chowk and from there, took a shared cab to Ghandruk.
As soon as I stepped into Ghandruk, it felt like I’d walked into a fantasy story from childhood books. It was so, so beautiful. I stayed at Hotel Old Village. They offer a package (stay + food + wifi) for NPR 2000 per person. The stay was charming, the food was delicious, and the people were incredibly kind and helpful. I was there for just a day but would 100% recommend staying longer… maybe even a week. I’m definitely going back.
I didn’t book the trek through any travel agency (they were charging a lot). You can easily find a local guide in Ghandruk at a much lower cost. I hired one there, and the next day, we began the trek.
Trek Day 1: Ghandruk to Upper Sinuwa


I started from Ghandruk around 10 in the morning and reached Upper Sinuwa by 6 in the evening. It was so hot that day, but in terms of difficulty, this was the easiest stretch.
The trail passed through Jhinu, Chhomrong and Sinuwa. Chhomrong is actually quite beautiful… the village existed long before trekking became popular, so it still has a lot of its old-world charm. It’s got cute cafes, little souvenir shops, and a beautiful Buddhist stupa right at the end of the village.
At one point, we crossed this super long hanging bridge… 280 metres. It actually sways while walking but nothing scary. By the time I reached Sinuwa, I was completely drained. Upper Sinuwa barely had 3 or 4 places to stay and most were full. Luckily, one room was available. Lower Sinuwa has better stay options, but honestly, I was too tired to go back.
I ended the day watching the sunset with a hot plate of dal bhat. Simple things really hit different in places like these.
Trek Day 2: Upper Sinuwa to Deurali


This was hands down my favourite trail of the entire trek. The path took us through Bamboo Village, Dovan, Himalaya, and finally to Deurali. Every few hours, the landscape changed completely… forests, waterfalls, caves.
Bamboo was so pretty. It’s surrounded by thick bamboo forests, hence the name. And Dovan was even more beautiful, very Pinterest-y. Next time I do this trek, I definitely want to stay in one of these two villages.
Somewhere between Dovan and Himalaya, there’s a small temple called Pujinam Baraha Mandir. There’s a waterfall right opposite it, covering the whole rock wall… absolutely stunning. After that point, you’re not allowed to carry meat or alcohol, out of respect for the local beliefs.
The route from Himalaya to Deurali was tougher. It started raining and became really slippery. I think I walked for nearly 7 hours that day. Reached Deurali, ate more dal bhat, and just crashed.
Trek Day 3: Deurali to Machhapuchhare Base Camp (MBC)


The plan was to trek till ABC, but that didn’t work out. It was raining when we left Deurali, and higher up, that rain turned into heavy snow. I was not prepared for that kind of weather. It made everything look magical, but walking in snow while it’s snowing is no joke.
I was supposed to reach MBC in two hours, but it took me four. By then I was freezing, soaked, and exhausted. I also started feeling slightly off… early signs of AMS. Thankfully, the garlic soup helped a lot (it’s one of the best remedies for AMS).
I decided to rest at MBC instead of pushing to ABC. I just didn’t have the energy left. Had dal bhat again and went straight to sleep.
BTW, there’s an interesting story about Machhapuchhare. In 1957, a group tried climbing it and camped at Camp II. But when they woke up, they were back at Camp I. The locals believe the mountain gods sent them back down. Since then, it’s illegal to climb Machhapuchhare. No one’s ever reached the top.
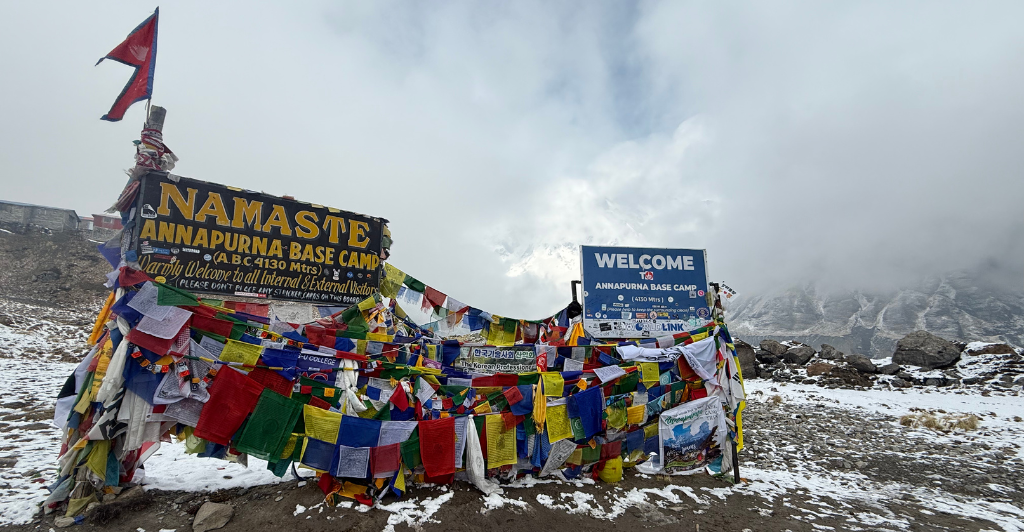
Trek Day 4: MBC to Annapurna Base Camp (ABC)


I was really excited that morning because I knew I was finally going to reach ABC. Woke up early, geared up for the snow, and started the trek at 7. I wore crampons, they are these metal spikes you attach to your shoes for better grip. They felt weird at first but were super helpful.
The trek from MBC to ABC wasn’t too difficult, and the snow had made everything around look like a dream. I remember coming across this tiny glacial pond on the way… the reflection of the mountains in it was surreal.
It took me around two and a half hours to reach ABC. The moment I saw the sign board, I just stood there for a while, soaking it in. I felt so proud. It’s hard to explain that feeling… standing in front of one of the top 10 mountains in the world, knowing you made it there!
I didn’t stay at ABC, though that would have been beautiful. Seeing the sun rise from the mighty mountains…uff!
I started the descent the same day and went down to Himalaya. That part was rough. My knees were killing me by the time we reached. And to top it off, I ran out of cash. My UPI wasn’t working either.
But the people were so kind. The staff at Hotel Royal Family gave me a room, food, even offered extra money just in case, all on trust. My guide also waited to take payment until my bank issue was sorted. I did pay everyone back later, of course, but I’ll never forget their kindness. It’s moments like these that make travel so special.
Trek Day 5: Himalaya to Chhomrong


By this point, I was beyond tired. My knees hurt like crazy and my body just felt done. But the views kept me going.
The plan was to reach Jhinu Danda, but I was so tired that I decided to stay in Chhomrong (Stayed at Chhomrong Guest House). That evening I was bored of dal bhat so I ordered momo and Wai Wai noodles. Big mistake. The momo were okay, but the Wai Wai just tasted off. Honestly, stick to dal bhat while trekking. They make that the best, and it’s the most nourishing thing after a long day. The view from my room, though, made up for everything.
Trek Day 6: Chhomrong to Jhinu Danda and Back to Pokhara


I started early and reached Jhinu Danda by late morning. If you’re doing this trek, don’t skip the hot springs there. It’s a bit of an extra walk but totally worth it.
The entry fee was 200 rupees. I didn’t go in fully, just dipped my legs and I swear, all my tiredness melted away at that moment. I felt so relaxed and refreshed.
After spending about an hour there, we walked some more, took a cab to a nearby point (don’t remember the name), and then hopped on a bus to Pokhara.
Finally back in the city, I treated myself to dinner at Vegan Way. You have to check this place out… great food, chill vibe, not too expensive. I watched the sunset by the lake and ended the day.
The End:
I stayed in Pokhara for another day… shopped a little, ate a lot of good food, and just chilled. It was the perfect pace after all that trekking. If you want to buy souvenirs or just want something memorable to take back, here are a few spots I really liked:
Got two beautiful rings from Martha’s Macrame. It’s a bit on the pricier side but their stuff is kinda unique and really pretty.
Got a hemp co-ord set stitched at Shyam Indra Tailors. You can literally show them a photo and they’ll stitch up the outfit in 24 hours. They use hemp and banana fibre materials… loved their work.
Picked up a few postcards and books from Book Mandala.
Bought a handmade paper diary and a natural loofah from The Earthly Treasures. It’s an expensive little boutique, but great for small, thoughtful gifts.
Got trekking shoes from Destination Himalaya Trekking Shop. Super reasonable and great quality… did the entire ABC trek in those.
Also picked up a rhododendron soap from a small shop whose name I, sadly, don’t remember.
The lakeside here is such a vibe… sunsets, cafes, shopping, street music, and just a lovely energy in the air. The nightlife is pretty decent too. The Vegan Way was my favourite café. Chill atmosphere, delicious food, and great prices.
The next day, I took a bus from Pokhara to the Sanauli border. The bus was actually really nice – AC and super comfortable. But the border crossing was exhausting. I had to stand in the immigration line for over two hours just to get one stamp. After that, I crossed over, took a cab to Gorakhpur, a bus to Delhi, and finally a flight back to Mumbai. This route definitely saved me money, but it drained every last bit of energy I had.
How Much Did I Spend on ABC?


Here’s a rough estimate of how much I spent and what you can expect if you’re planning this trek.
I took a slightly longer route. Flew from Mumbai to Colombo, then to Kathmandu, and finally to Pokhara. It had multiple layovers, but I saved quite a bit on the flight cost overall. On the way back, flights were too expensive and trains were full, so I went from Pokhara to the Sanauli border, crossed into India, then took a cab to Gorakhpur, a bus to Delhi, and finally a flight to Mumbai. There’s a direct train from Mumbai to Gorakhpur too, but it’s usually packed and agents ask for ridiculous amounts during peak season.
I didn’t go with a tour package. Most were charging around ₹40,000 per person, and even then, I’d have to trek with a group. Instead, I landed in Pokhara and figured things out from there and it worked out great. You’ll find local guides easily, and they charge on a per-day basis (around NPR 2000–3000). If you’re trekking with a friend or group, it gets even more affordable.
To enter the Annapurna Sanctuary Area, you’ll need a permit – NPR 1,000 for Indian citizens. That’s it. No other permit is required. Just carry your passport and a passport-size photo. Do it yourself and save on extra charges.
Stay and Food During the Trek
I’d recommend going for full-board packages (stay + food + Wi-Fi), especially at higher altitudes. Everything is chargeable otherwise — hot showers (NPR 200), phone charging (NPR 250 per device), Wi-Fi (NPR 200). Packages can be more economical overall.
At lower altitudes, packages start around NPR 1,500–1,600. As you go higher, prices rise to NPR 2,500–3,000, so calculate whether packages or separate payments make more sense based on where you are.
Stay and Travel in Pokhara
Pokhara isn’t very expensive if you plan it well. Dorms cost around NPR 600 and you can find a decent private room for under NPR 1500. I mostly ate at The Vegan Way, so that cost me around NPR 500 per meal.
For transport, I walked a lot or took buses. When needed, I booked cabs through InDrive, which was slightly expensive. Renting a scooter might’ve been cheaper… I’ll definitely try that next time.
Total Cost?
If you plan smart, you can easily do the entire ABC trek comfortably under ₹35,000 per person. That includes travel, permits, food, accommodation, and guide charges.
(Just note that prices will vary depending on the season and availability. I did this trek in April 2025, so your costs may be a little different.)
Pro Tips for the Trek:


- Pack for all kinds of weather. It could be sunny one day and snowing the next.
- Bottled water in Nepal is expensive. So buy water purification tablets. You’ll save thousands. Just drop one in a litre of water, wait 30 mins, and it’s safe to drink. I bought mine from a local medical store in Pokhara.
- Carry enough cash. There are no ATMs or exchange points in the mountains.
- Start training. Even 2 weeks of stair climbing, jogging, and/or weight training can make a big difference.
- If you feel AMS symptoms, have garlic soup and take a break.
- Use the zigzag method while climbing. I saw porters doing this and it made the steep climbs easier.
- Invest in good gear. You’ll find most essentials in Pokhara. I got my trekking shoes there… great quality and affordable. A good trekking pole helps a lot too. You can rent other essentials like crampons (those metal grip attachments for snow and mud) during the trek.
If you have any questions or need help planning, feel free to DM me on Instagram: @therunawaychick. Bye!